How I render large 3D tilemaps with a single draw call at 3000 FPS
High-performance tilemap rendering in Unity and Rust + GLSL
21 min readTable of contents
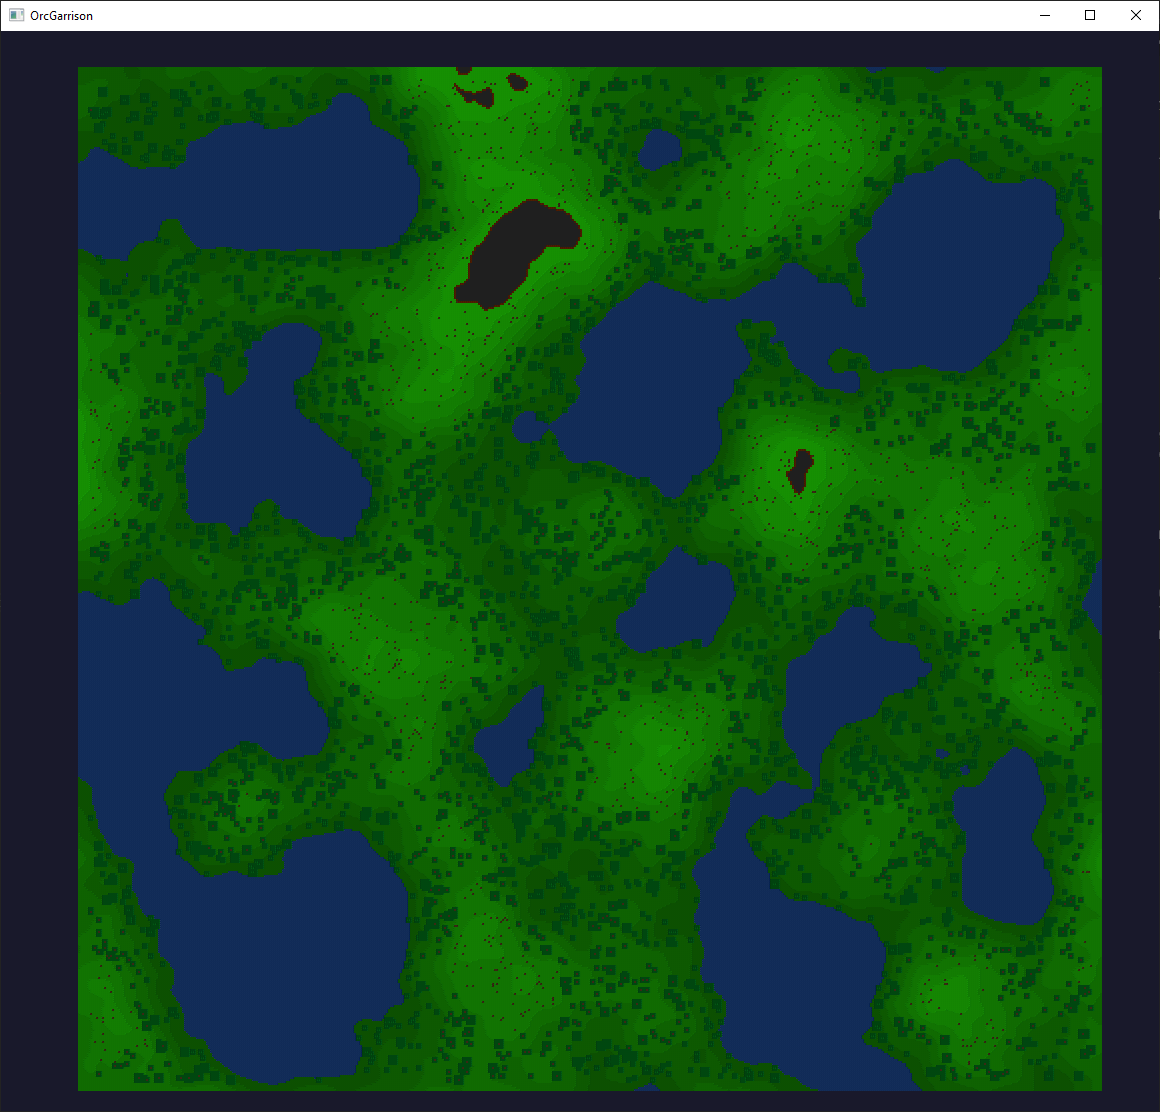
Almost exactly one year ago I started working on a little hobby game project, inspired by games like Dwarf Fortress, RimWorld and Prison Architect. The idea was essentially to build a game somewhere between a town builder, a real-time strategy game and a life simulation, set in a procedurally generated voxel world with a fixed top-down camera. The game would also feature an extensive underworld of natural caves, abandoned mines and mysterious dungeons, with dozens (or preferably hundreds) of layers. Players could switch between layers to see below ground, and layers below the current layer would also be rendered.
First iteration: Unity’s tilemap system
The first prototype was built using the Unity game engine. It originally used Unity’s built-in tilemap system, including the tilemap renderer component. While it was good enough while experimenting with the core game mechanics, I soon ran into some limitations when trying to scale it up.
No support for 3D
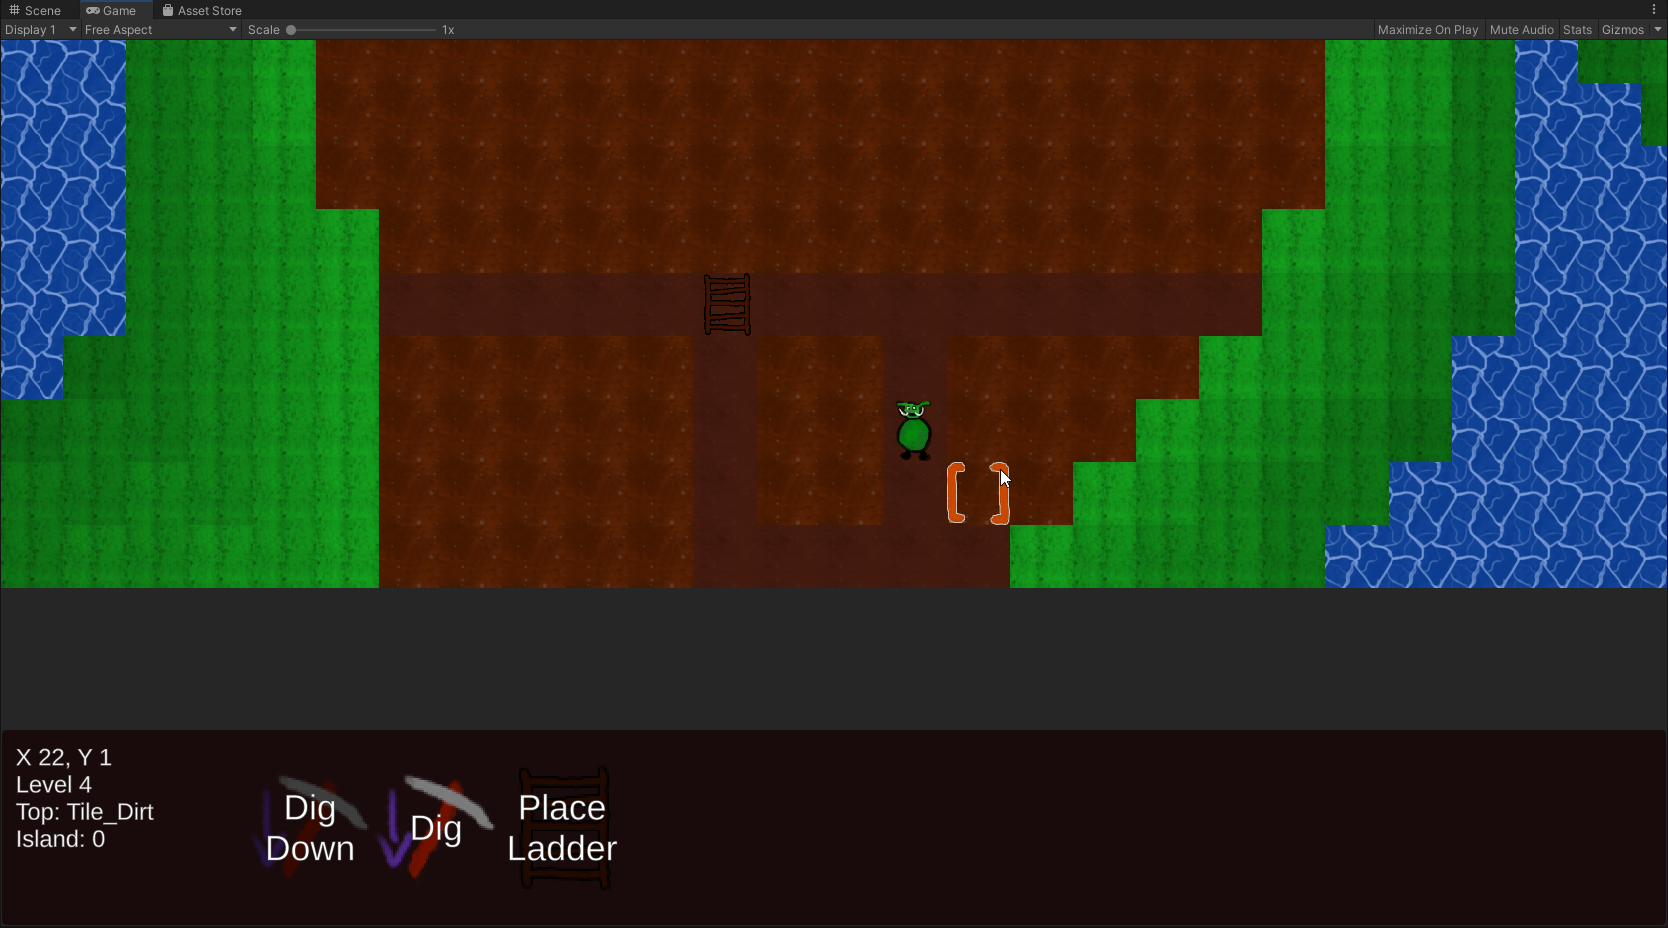
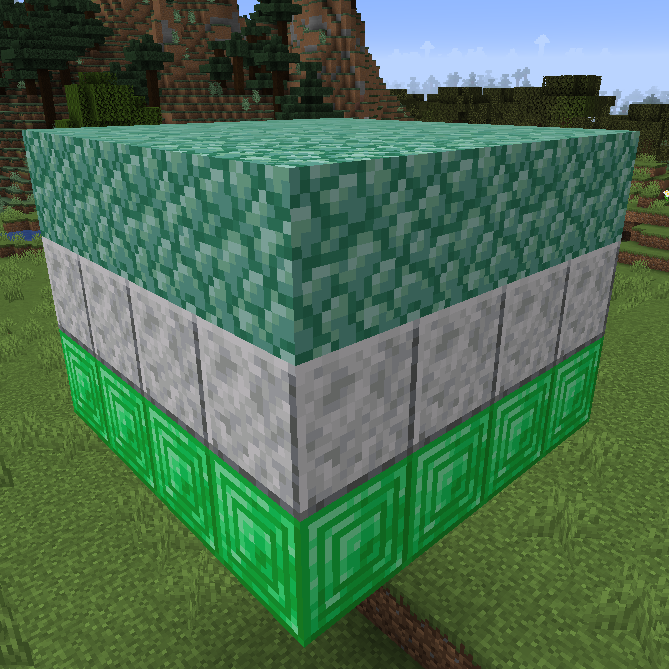
The system doesn’t natively support multiple layers or 3D maps. You can emulate multiple layers by using more than one tilemap renderer at the same time, and it is exactly what I did. Using it in this way requires a bit of glue code to translate 3D coordinates to the correct tilemap layer. I ended up using two tilemap renderers for each Z level, because each location can have separate floor and wall / block tiles (e.g a layer of grass covering a cube of dirt), just like Dwarf Fortress.
No per-tile data
You can’t easily add any custom data to individual tiles, which can be a problem with more simulation-focused games (like this one). One seemingly popular option is to store extra tile data separately from the tilemap in a hashmap indexed by the coordinates. While this certainly works, it’s not exactly ideal for games where practically every tile should have some information associated with it.
I opted instead to create a separate system for world data outside of the tilemap system to act as the single source of truth. World data was stored in multiple flat arrays — one for each layer — while the tilemap system was relegated to being just a renderer. All modifications to the world data were synchronised to the corresponding tilemap renderer before the next frame. This worked surprisingly well in my case: usually only a handful of tiles changed each frame, and a slow full re-sync only had to be done when the world changed completely. This also meant that the game world was renderer and almost game engine agnostic.
Performance concerns
The tilemap renderer is not particularly efficient, at least when used in this manner. Each tile is rendered using two triangles, and draw calls are batched per material type. However this batching only works within a single tilemap renderer, and I used many. The much bigger issue was the triangle count. As an example, a world sized 512x512 tiles with a maximum rendering depth of 16 layers at 2 tilemap renderers per layer could result in almost 17 million triangles being rendered each frame. This is completely unreasonable for a game which looks like it’s from 1992 at best. While out of view tiles are not rendered thanks to Unity’s use of frustum culling, tiles covered by other tiles are still rendered. This causes a ton of overdraw, which means rendering is very inefficient.

Second iteration: Custom renderer using a fragment shader
There were many possible ways to improve the tilemap renderer.
One option would have been to implement some sort of a custom culling solution for not rendering tiles completely covered by others. However, it wasn’t immediately obvious to me how it could have been implemented efficiently for a dynamic world where the active layer can be changed at any time.
Another alternative would have been to generate an optimized mesh from the world data where all contiguous areas of the same tile would have been merged together. This would have radically cut down on the triangle count in most cases, but a naïve implementation would still have suffered from overdraw, and keeping the mesh up to date could have also been challenging. But most importantly for a hobby project it didn’t sound fun to implement.
I didn’t go with either of these solutions, because I stumbled upon an option that seemed simple yet efficient: rendering the tilemap with a custom shader. One particularly important source of inspiration was the blog post Tinkering with Tilemaps, which demonstrated a 1024x1024 tilemap being rendered using WebGL with excellent performance. All of this was done with a single quad and a single draw call.
Shader method summarised, with more words and less detail than the original article

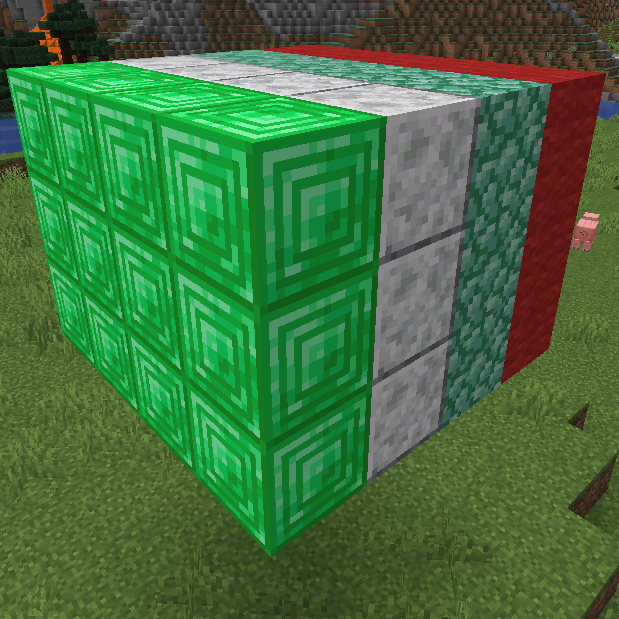
All tile types are combined into a single texture called a tile atlas (or a tileset). The atlas can be a square, or just a long strip of all tiles side by side. The important bit is that each tile is the same size, and each tile type has an associated integer identifier (a tile index) which can be used to calculate its coordinates in the atlas. Tiles can also have fully transparent pixels, rendered in the example above with pinkish magenta. I started with a hand-assembled atlas, but soon afterwards I wrote some code to generate it on startup from my tile definitions.

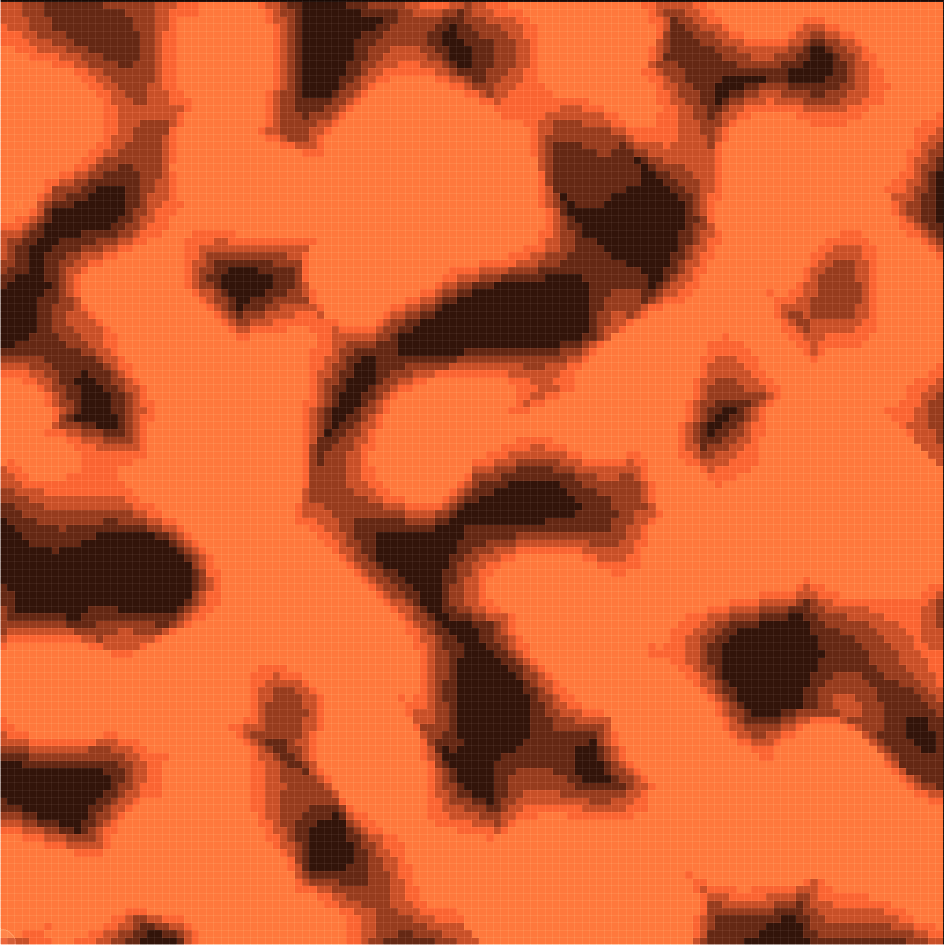
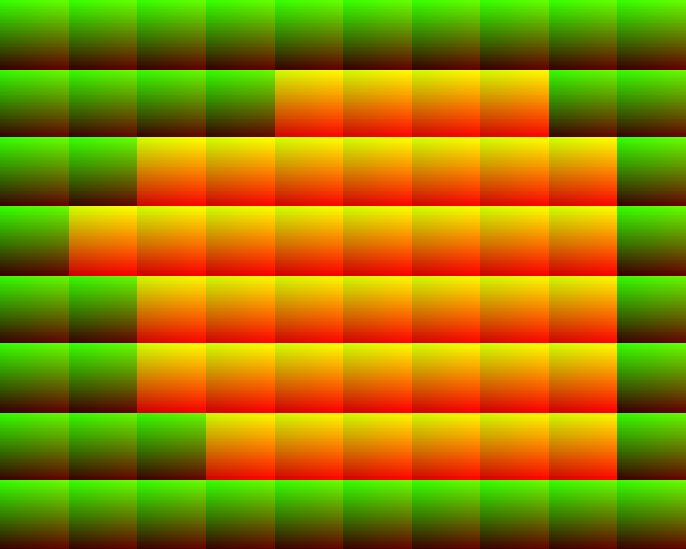
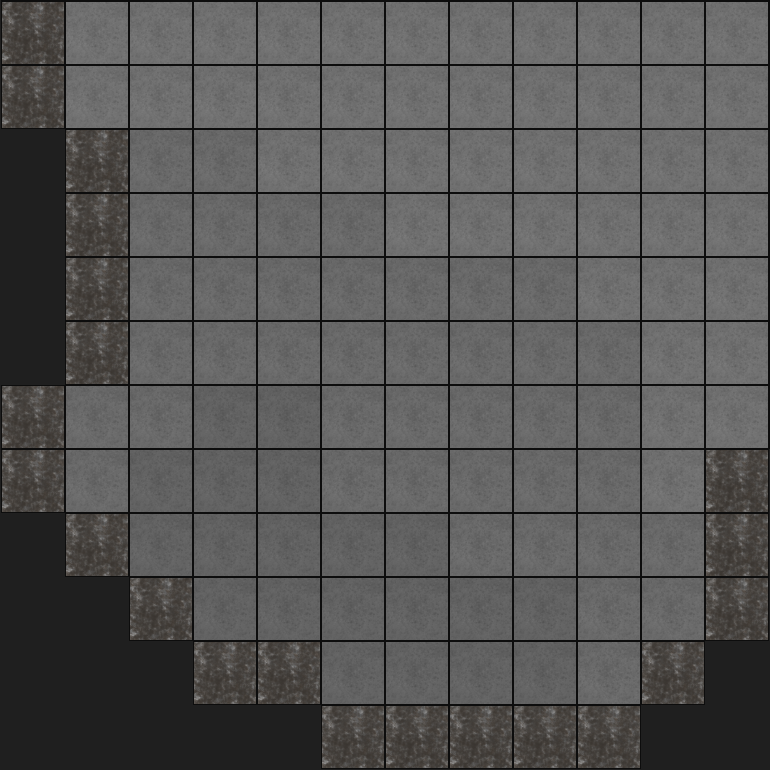
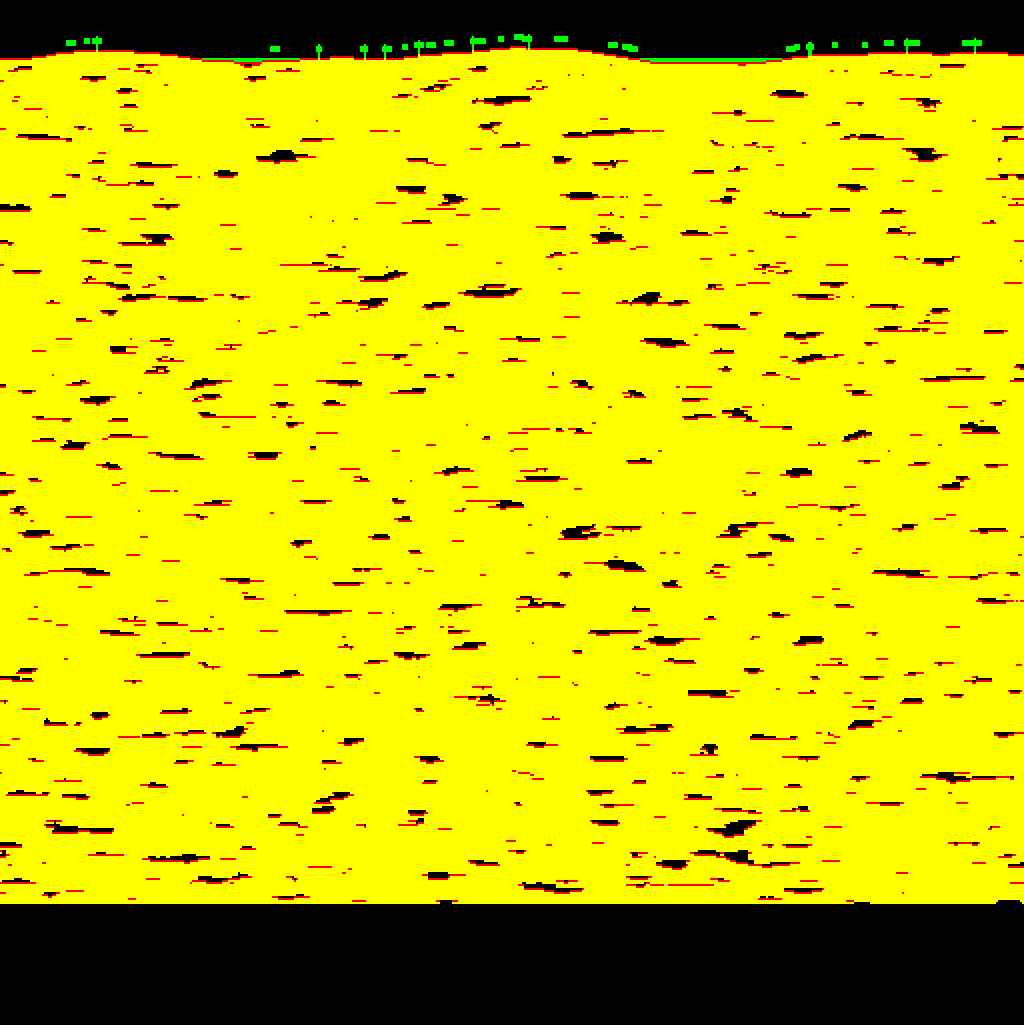
A single channel 16-bit texture is allocated for each tilemap renderer with the same dimensions as the tilemap. Each tile index is read from the tile data and copied into the corresponding location in the texture. With two tile types this results in something like the example above, except I’ve boosted brightness significantly so that it isn’t just a black void. Using a 16-bit texture means the system supports up to 216 unique tiles, which is more than plenty (— you will run into texture size limitations with the atlas way before reaching that many tiles anyways). In case of my game, the texture needs to be updated whenever the world data changes.
The final piece of the puzzle is a two-triangle quad mesh which is used to, well, actually render the tilemap. A simple 1x1 unit square works for this purpose, which can then be scaled to match the size of the map. The only requirement for the quad is to have UV texture coordinates for all 4 vertices so that it can be correctly textured.
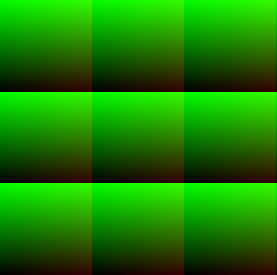
Finally, we get to the shader, which assembles these assets together. The shader samples the tilemap texture using the UV coordinates at each fragment to get the corresponding tile index. The tile index is then used to calculate the UV coordinate for the tile in the texture atlas’ space, and the texture atlas is sampled to get the final pixel colour. My implementation also adds the ability to tint the entire tilemap using a simple multiplication operation. This is used to darken the layers below for a depth effect.
Shader Graph
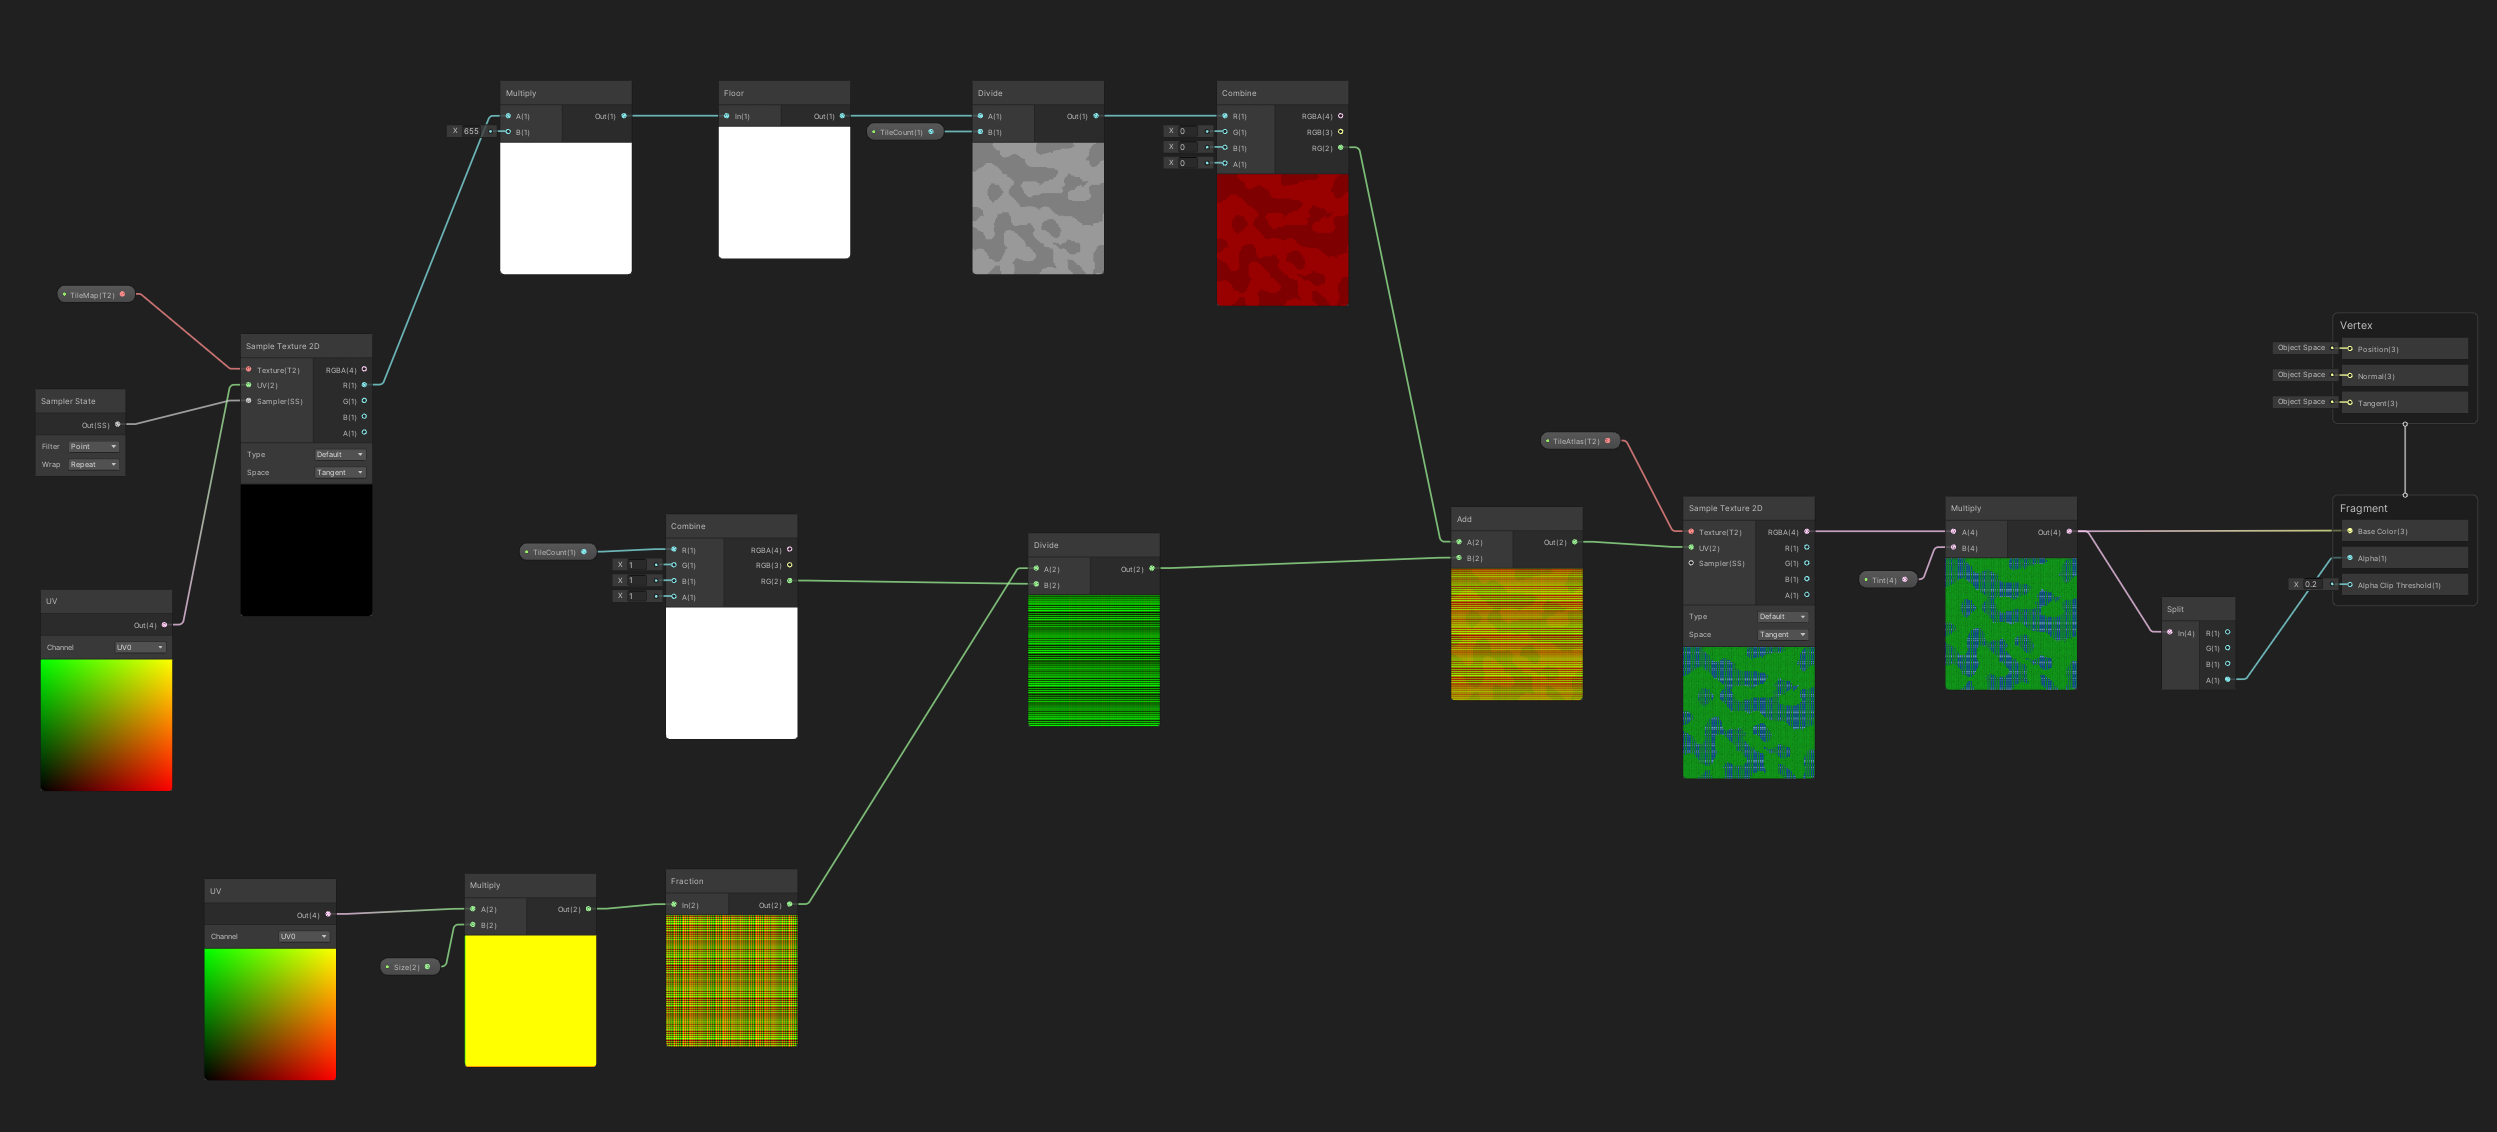
I implemented my own version using Unity’s node-based visual shader editor, Shader Graph, based on the blog post’s GLSL code. Shader Graph was both very useful and kind of tedious to use. What drew me to using Shader Graph is the fact I’m still not very experienced with shader programming, and my past experiences working with shaders in Unity have left the impression of a barely documented mess. The biggest benefit of Shader Graph for me was the ability to continuously see the results of each operation while working on the shader.
One limitation I ran into with Shader Graph (or maybe Unity itself?) was the inability to use integer textures directly. As far as I remember the only supported single channel 16-bit texture format was R16_UNorm, which means that even though the texture data consists of 16-bit integers, sampling the texture in a shader only yields floats, which are normalized from the original 0 to 216- 1 range to 0..1. This isn’t anything that can’t be fixed with a few simple operations (multiplication + floor), but it’s a bit annoying given that as far as I can tell all modern graphics APIs support integer textures just fine. Unity does define other 16-bit texture formats, but trying to actually use them throws a runtime exception (Unity 2020.3, URP, DX11 & a modern NVidia GPU).
Results
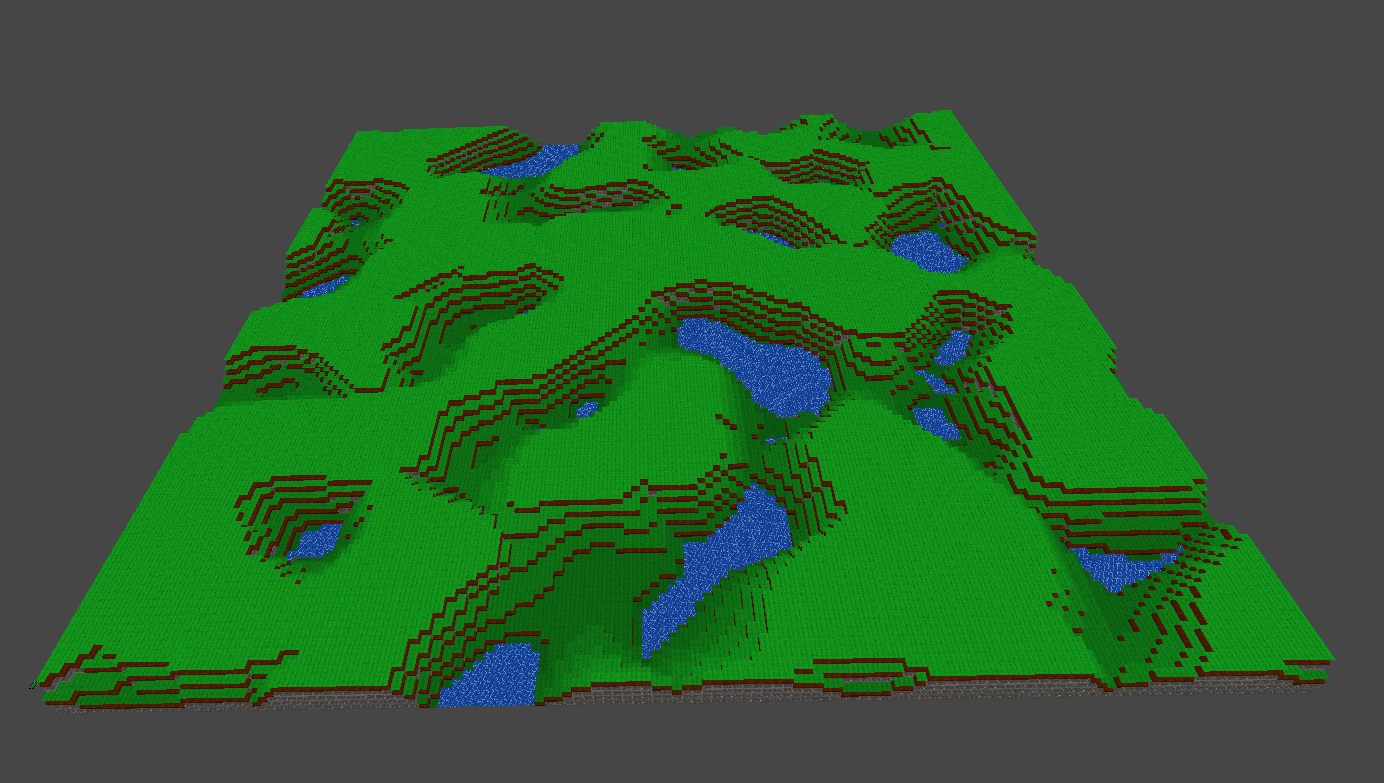
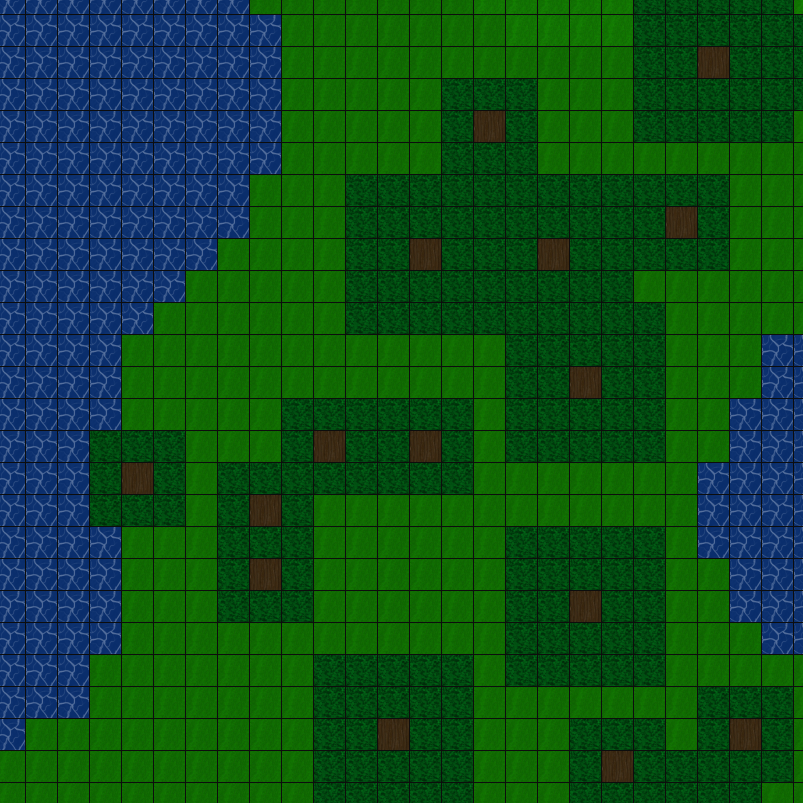
The performance was excellent considering the simplicity of the implementation. The number of polygons and draw calls now only depends on the number of simultaneously rendered layers, not the size of the world itself. Since tiles were no longer made of individual polygons, they can’t be culled using frustum culling, but that doesn’t matter since fragments outside the screen are generally speaking not rendered at all. A neat side effect of the approach was that the camera can be switched from orthographic to perspective to view the world in almost good-looking pseudo-3D.
There is still room for further improvement.
What the solution gains in performance is lost in flexibility. None of these things is a deal breaker for my game, but using this approach in its simplest form is not suitable for all games.
- Texture atlases (without padding) are known to be incompatible with mipmapping, which means the tilemap will always look kind of pixelated and artifact-y, especially when zooming by a non-integer factor.
- There is less visual customizability. Unity’s tilemaps supports tinting and even rotation per tile type. Some of this could be implemented by dedicating a few of the 16 bits for rendering flags (e.g flip in the x axis, rotate by 90 degrees) or for choosing a tint colour from a fixed palette.
- All tile types have to be known in advance.
- All textures must have the same resolution.
- There is no obvious way to do texture animation.
- You could update the atlas at run time, but that would change the look of every tile with the same tile ID, which is oftentimes unwanted.
- You could have separate tiles in atlas for each animation frame, and then modify the tile IDs in the tilemap accordingly. But then you’d have to reserve some tile IDs for animation frames, which somewhat complicates things.
The overdraw is still present, because for some reason Unity renders the layers from back to front. This is probably something that could be fixed given enough time, but it’s hard to pinpoint the exact reason why this happens. I’m using the 2D variant of the Universal Rendering Pipeline, which at least at the time (early 2020) seemed kind of unfinished.
There is also some memory overhead, which doesn’t really matter in smaller worlds but becomes more impactful with more Z layers. Like before, each Z level has two (custom) tilemap renderers: one for the floor layer, and one for the wall layer. Each renderer has the aforementioned tilemap texture, while the atlas is shared across all instances. Because of the way Unity’s Texture2D works, textures created at runtime are always kept in main memory and therefore consume both RAM and VRAM. An individual tilemap texture doesn’t need much memory, but the consumption increases linearly with more layers. Each layer’s buffers remain allocated and are kept up to date even when the layer is not visible.
Disunification
After more or less finishing the new renderer I worked on the game for one more week, and then mostly forgot it for almost a year. There was no single reason for abandoning it. Maybe I felt a bit burnt out after working on it actively for a few weeks. I returned briefly in October to update it to the latest Unity release, but didn’t implement any new features.
Then in February 2021 to pass the time during the third wave of COVID19 I got back into the project.
commit 6320a0fb91368d6947482d398549e0fdff5ed060
Author: Paavo Huhtala
Date:   Sat Feb 6 19:06:02 2021 +0200

    Initial renderer & ECS architecture
But instead of continuing the previous Unity-based prototype, I restarted from scratch. I had come to the conclusion that for a project like this Unity had very few benefits over writing a custom engine. In addition to implementing my own tilemap renderer:
- My entire game state and game loop were basically 100% independent from Unity.
- I implemented custom binary (de)serialization for the game state, because Unity’s own serialisation had major limitations.
- I didn’t really use game objects or components except for rendering.
- The world was procedurally generated, so I didn’t need to use Unity’s level editor.
- A lot of game content was stored in custom TOML files, which were loaded at run time.
- I started with
ScriptableObjects, but they suffered from the same serialisation limitations as the game state and were just clunkier to edit than plain text files. - These files referred to PNG texture files, which were also loaded dynamically at run time, bypassing Unity’s content pipeline.
- I started with
- I used Rewired as my input handling solution, because Unity had deprecated the old (slow & limited) one while the new was still unfinished. This is a really common pattern with Unity.
So I was mostly using Unity as a needlessly heavyweight platform abstraction.
Rewriting it in Rust
The new iteration of the game is written in Rust, and it uses Specs ECS for game logic, SDL2 for window creation and event handling, and Luminance + GLSL for rendering. There are quite a few interesting things to tell about the new engine (such as the completely custom ECS-based UI system, featuring a Flexbox-esque layout algorithm), but I’ll save those for later. We’ll focus on rendering and related systems for now.
Rendering is based on Luminance, which is a relatively low-level graphics abstraction library. It manages OpenGL pipeline state to make it more memory safe and easier to use, and not much else. It does also support WebGL, but I’m only using it with OpenGL 3.3 at the moment. While that’s an ancient version of OpenGL (or practically bleeding edge in the Apple ecosystem), it has so far supported everything I need. Shaders are written in plain old GLSL. I implemented a simple shader hot reloading system using the notify crate. This has really paid off when developing new shaders; hacking on graphics code is now much faster than before.
The new tilemap renderer
The new tilemap renderer is based around the same core ideas as the Shader Graph version, but there are also some more fundamental changes.
Voxel storage
The world data format has maybe changed the least, but it has important consequences for the rest of the system. I’m using a flat array for storing voxels as before, but this time everything is in one array instead of having a separate buffer for each layer. Each voxel — like before — consists of two 16-bit numbers: the floor tile index, and the wall tile index.
The hottest technology of 2008 — array textures
Texture atlases have been replaced with a slightly more modern solution: array textures. They are basically what it says on the tin: it’s a way to store multiple textures of the same size in an array, which can be indexed with an integer in fragment shaders. This maps almost directly to the way I use tile IDs, so the code for computing atlas UV’s from a tile ID can now be completely removed. Array textures have also the added benefit of supporting standard texturing features, such as wrapping, repeating and mipmapping.
Voxels on the GPU
This is the part I’m most proud of. Using our brand spanking new array texture technology combined with the new world format, we can store the game world on the GPU as a single huge texture array. In fact, the world data in RAM has exactly the same memory layout as the corresponding texture array on the GPU (RG16UI), meaning we can just copy it to the GPU without any processing in between! This is accomplished using a little unsafe-powered method on the WorldData struct:
pub fn as_u16_slice<'a>(&'a self) -> &'a [u16] {
  unsafe {
    let raw_data = (&self.data[0]) as *const Voxel;
    let raw_data_as_u16: *const u16 = mem::transmute(raw_data);
    slice::from_raw_parts(raw_data_as_u16, self.data.len() * 2)
  }
}
There is also a static assertion to ensure that the transmutation is correct:
extern crate static_assertions as sa;
sa::assert_eq_size!(Voxel, [u16; 2]);
The method is then used to update the tilemap texture:
pub fn update_from_world_data(&mut self, world_data: &WorldData) {
  let texture_data: &[u16] = world_data.as_u16_slice();

  self.tilemap_texture
      .upload_raw(GenMipmaps::No, &texture_data)
      .unwrap();
}
This takes a reasonable ~50 milliseconds on a modern desktop GPU when the world has 5123 voxels (which is over 500 megabytes of data). However, this is not as important as it may sound like. The world data is fully synchronised with this method only when the level changes completely in a single frame, so basically only when generating a new world or loading a saved game. The rest of the time the buffer is updated in much smaller parts, by only uploading the changed bits to the GPU. One nice bonus over Unity is that the texture only exists in VRAM after creation, so it doesn’t waste any extra RAM.
The inherent downside with this approach is that there is no such thing as abstracting the renderer from game logic. When the world representation changes, the rendering code also has to be modified. If I were to add more fields to Voxel, it would have to be done in a way that is compatible size and alignment wise with a supported texture format. And of course adding any data to the world increases VRAM requirements, even if doesn’t have an impact on the visuals.
I guess this is basically raymarching?
Now that we have all of the world’s data in a single buffer accessible in the fragment shader, we can render all layers at the same time into a single quad, in a single draw call. The basic idea is the same as before, but now after calculating X and Y coordinates from UV we use a simple for loop from active Z layer downwards to figure out which tile to render. If there’s no tile, we’ll move deeper into the scene. You could maybe draw parallels between this and ray marching.
Here’s a cleaned up and slightly simplified version of the fragment shader.
#define MAX_LAYERS 512
#define MAX_SHOWN_LAYERS 16

in vec2 v_uv;
out vec3 frag_color;

// The size of the tilemap
uniform uvec2 dimensions;
uniform usampler2DArray tilemap;

// Block/wall tiles and floor tiles have separate atlases
uniform sampler2DArray tiles;
uniform sampler2DArray floor_tiles;

// The active layer. Nothing above this is rendered.
uniform uint current_layer;

void main() {
  // Calculate the range to iterate over
  int start_layer = int(current_layer);
  int lowest_layer = max(0, start_layer - MAX_SHOWN_LAYERS);

  // Calculate the Y coordinate
  float y_pos = floor(v_uv.y * dimensions.y);

  for (int layer = start_layer; layer >= lowest_layer; layer--) {
    // Combine all parts to get full 3D coordinates for this voxel
    vec3 pos = vec3(float(layer) / MAX_LAYERS, v_uv.x, y_pos);

    // Sample the voxel buffer to read the tile IDs
    uvec4 sample = texture(tilemap, pos);
    // Note that we get integers directly from
    // the texture sample - unlike in Unity
    uint block = sample.g;

    // Zero is reserved for empty tiles
    if (block != 0u) {
      render_tile(tiles, block, start_layer - layer);
      return;
    }

    uint floor = sample.r;

    if (floor != 0u) {
      render_tile(floor_tiles, floor, start_layer - layer);
      return;
    }
  }

  // Render the background colour if there's a hole in the world
  frag_color = vec3(0.12, 0.12, 0.12);
}

void render_tile(sampler2DArray atlas, uint tile, int depth) {
  // Calculate texture space coordinates for this fragment
  vec2 local_uv = fract(v_uv * vec2(dimensions));
  // and use them to sample the correct tile texture
  vec4 texture_sample = texture(atlas, vec3(local_uv, tile - 1u));

  // Dim tiles below the current layer to get a depth effect
  float relative_depth = depth / float(MAX_SHOWN_LAYERS);
  float dimming_factor = 1.0 - relative_depth;

  frag_color = texture_sample.rgb * dimming_factor;
}
More on memory layout
If you read the shader very carefully, you might have noticed something unexpected about the coordinate order (and therefore the memory layout) of the voxel buffer.
vec3 pos = vec3(float(layer) / MAX_LAYERS, v_uv.x, y_pos);
Originally the memory layout reflected the previous design, where each layer of the world had a corresponding layer in the array texture. This is quite intuitive, as texture coordinates would map more or less directly to world coordinates. However, I decided to change the coordinate system and “slice” the world differently. Now each element of the array texture contains all of the blocks from one Y coordinate. In other words, the new memory layout is Y->X->Z.
There were two reasons for this change.
Concurrency
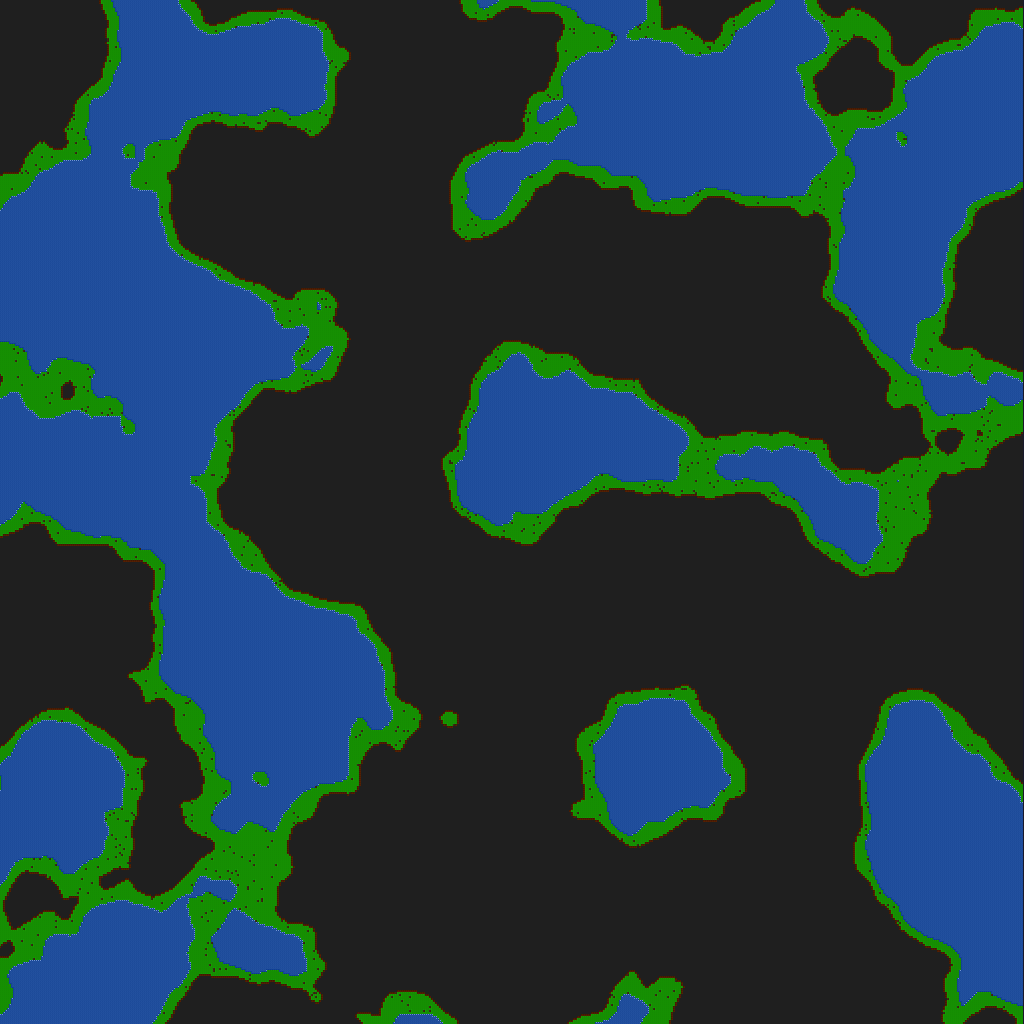
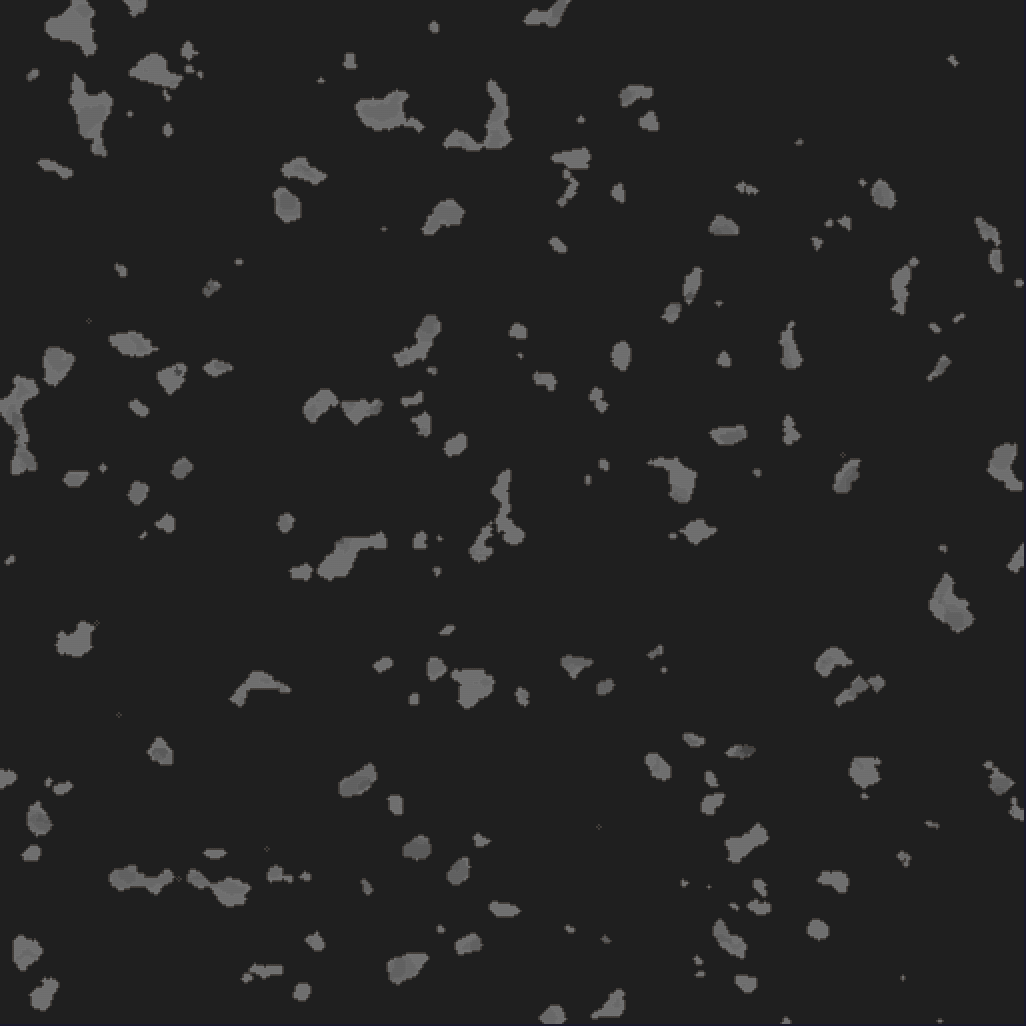
Generating a world of this size takes quite a bit of CPU time. The world generator works by sampling different 2D and 3D noise algorithms and combining their results together. In theory, the tile IDs at each 3D coordinate only depends on the three coordinate variables, and nothing else. This is a classic case of an embarrassingly parallel problem. However, just naïvely sampling all the noise for each voxel would not be very efficient, because the 2D noise algorithms yield exactly the same result for all (X, Y) coordinate pairs.
This memory layout enables the world generator to split the world buffer into contiguous slices (which is required in Rust to have multiple simultaneous mutable references to the same buffer) and then run the world generator efficiently in parallel without performing any duplicate work. This was really easy to accomplish with Rayon, and provided almost linear scaling with the number of available CPU cores.
Memory locality
Since both world generation and rendering involve repeatedly accessing the world buffer at sequential Z coordinates, I got the idea that this memory layout could further improve the performance thanks to better use of cache memory. In this layout, voxels at (X, Y, Z) and (X, Y, Z + 1) are right next to each other in memory.
I have not measured the actual performance impact of this change, but this wasn’t the main motivation to do it anyway. In theory it should yield good performance gains at least on CPU side.
I must proceed at a high velocity
How does it perform?
The short answer is that it’s fast enough for me. It runs consistently well on my desktop computers and my MacBook Pro, and that’s good enough.
The long answer is that it’s probably fast enough for you too, dear reader. I did some frame time measurements which indicate that the new renderer takes about 200 to 300 microseconds on average to produce each frame when rendering a 512x512x512 world at 3440x1440 screen resolution, using an RTX 2080 Super graphics card. In other words, the tilemap renderer runs at a coil whine inducing speed of about 3000 to 5000 FPS, with occasional drops down to measly 1000 FPS. This is bound to change when the game gets more complex, but this is much better than I dared to expect.
Closing thoughts
I’m really happy with the current tilemap rendering solution. I can now focus on other aspects of the game, without having to worry if rendering scales up to the level required by my game design ideas. It surprised me that the approach works so well without doing any chunking, dynamic loading, level of detail optimization, et cetera. It almost sounds too dumb to work, but I guess this is exactly the kind of workload modern GPUs were designed for. Since rendering takes a miniscule amount of time, I can now safely spend most of the frame time doing computationally intensive game logic, such as pathfinding or even water simulation.
